Sunrises or sunsets are without a doubt a great time for photography because they add a lot of nice colors and details to the sky in your images. But car trails do so too, so here is how you get both benefits within one final photo.
Every time I use the word sunset within this article it goes without saying that the same applies to sunrises too, but to make it easier to read for you I will stay with the sunset. Nonetheless, I would recommend any beginner to start trying this technique in the evening. I will explain the reason behind this later in this article.
Taking the photos
So, the usual problem is, that car trails are hard to capture during sunset because the contrast of the car lights isn’t good enough and a lot of cars haven’t switched on their lights yet. You could try to get longer exposures by using ND filters, but it very much depends on how you want the sky to look.
Instead of trying to get everything right within one single shot, I would definitely recommend you to focus first on your scene and the perspective. You already see the cars driving by, but that doesn’t matter right now. Just make sure that they will be in your frame and try to capture the sunrise and your scene as you would normally do, but - and here is the important part - never move your tripod or change your perspective when you are satisfied with the photo you took. That’s why it’s essential that you take your time to find the perfect perspective for your image because you won’t be able to change it afterward.
Usually, you want to make sure that nothing is burned out by having a look at the histogram. I am explaining everything you need to know about this in my other article about How to get perfect exposures for every photo you take. I took 2 shots that I will blend together afterward into one photo to get all the details I need in my scene. I did a 1/8 sec. exposure for the dark one, which gives me all I need for the sky, and a 4 sec. exposure for the highway and the mountain in the fore-to background.
If everything works out nicely you will end up with photos that might be looking like the following ones. You can already see the car trails, but they are very short and not that bright because my exposure time of 4 seconds isn’t long enough yet. I already used a 10-stop ND filter to get those longer exposures and a softer sky, but it's still not enough to get the very long trails I wanted to have in my final image.

This is the short exposure for the sky.

This is the longer exposure for the foreground.
Depending on the season you will now have to wait for about 30 to 60 minutes just right before blue hour because that’s the time when it starts to get pretty easy to capture all those beautiful light trails without any filters. The idea behind this is to capture the perfect sunset and take additional photos of the light trails after the sun is gone and when they are easy to photograph. The only thing that is essential to this technique is to get those shots without moving your tripod because that’s what saves you a lot of time and effort in post-processing. If you’ve done this you might end with photos like the following ones. As you can see the sky is totally burned out, but we don’t care about this part in the photo anymore, because we already got our perfect sky in the photos during sunset when the sky was just perfect.

Car trails for the left side of the highway.

Car trails for the right side of the highway.
As you might have seen already, I paid a lot of attention to the cars and where exactly they were driving by the place I stood, because you won’t have full streets all the time. So just make sure that you have multiple photos of the trails that add up to a street that is full of them when you layer them because that’s what we are going to do afterward in Adobe Photoshop. The more photos you take from the light trails, the more combinations you can try to find the best-looking result.
And here is the reason why sunsets are a little bit easier to photograph, especially when you lack experience or if you don’t know a spot that well. You can find your perfect spot and frame when it’s still bright outside during the day instead of needing to find the best perspective in the dark before the sun rises. For a sunrise, you would need to get good car trails first and you would have to make sure, that cars are driving by during this time, which is usually no problem during the winter season when the sun is rising pretty late. During summer it’s not so easy very early in the morning if the road isn’t that frequented. Just keep that in mind when planning your shots.
Post processing in Adobe Photoshop
First I am always starting in Adobe Lightroom to do some minor improvements to the RAW files, which very much depends on the scene. After blending the initial 2 images for my scene together my result looks like this, but as you can see I am definitely not happy with the car trails. They are barely visible and lacking in contrast and brightness.

After blending my multiple exposures for the general scene I am already satisfied with the sky and the perspective overall, but the car trails are definitely not good enough.
And here is when we need the shots we took afterward just for the car trails. Just open up your final image + the car trails you want to use in Photoshop as layers and watch out for your initial image which needs to be the lowest layer. Afterwards set the blend mode of your car trail layers to "lighten", which adds the brightest pixels to your original photo. As you can see the light of the cars will already be added, but the rest of the image might look weird because it got too bright.

After setting the layer mode of the upper car trail layers to lighten, the highway itself looks already pretty nice, but the sky gets brightened too.
You can now easily remove those bright parts in the sky by using masks. If you have a lot of layers for the car trails you might want to group them first and add the mask to the group. I removed some of the streams too, like the one on the left side, which was probably the roof of a truck. After doing this you might end up with a result like this one.

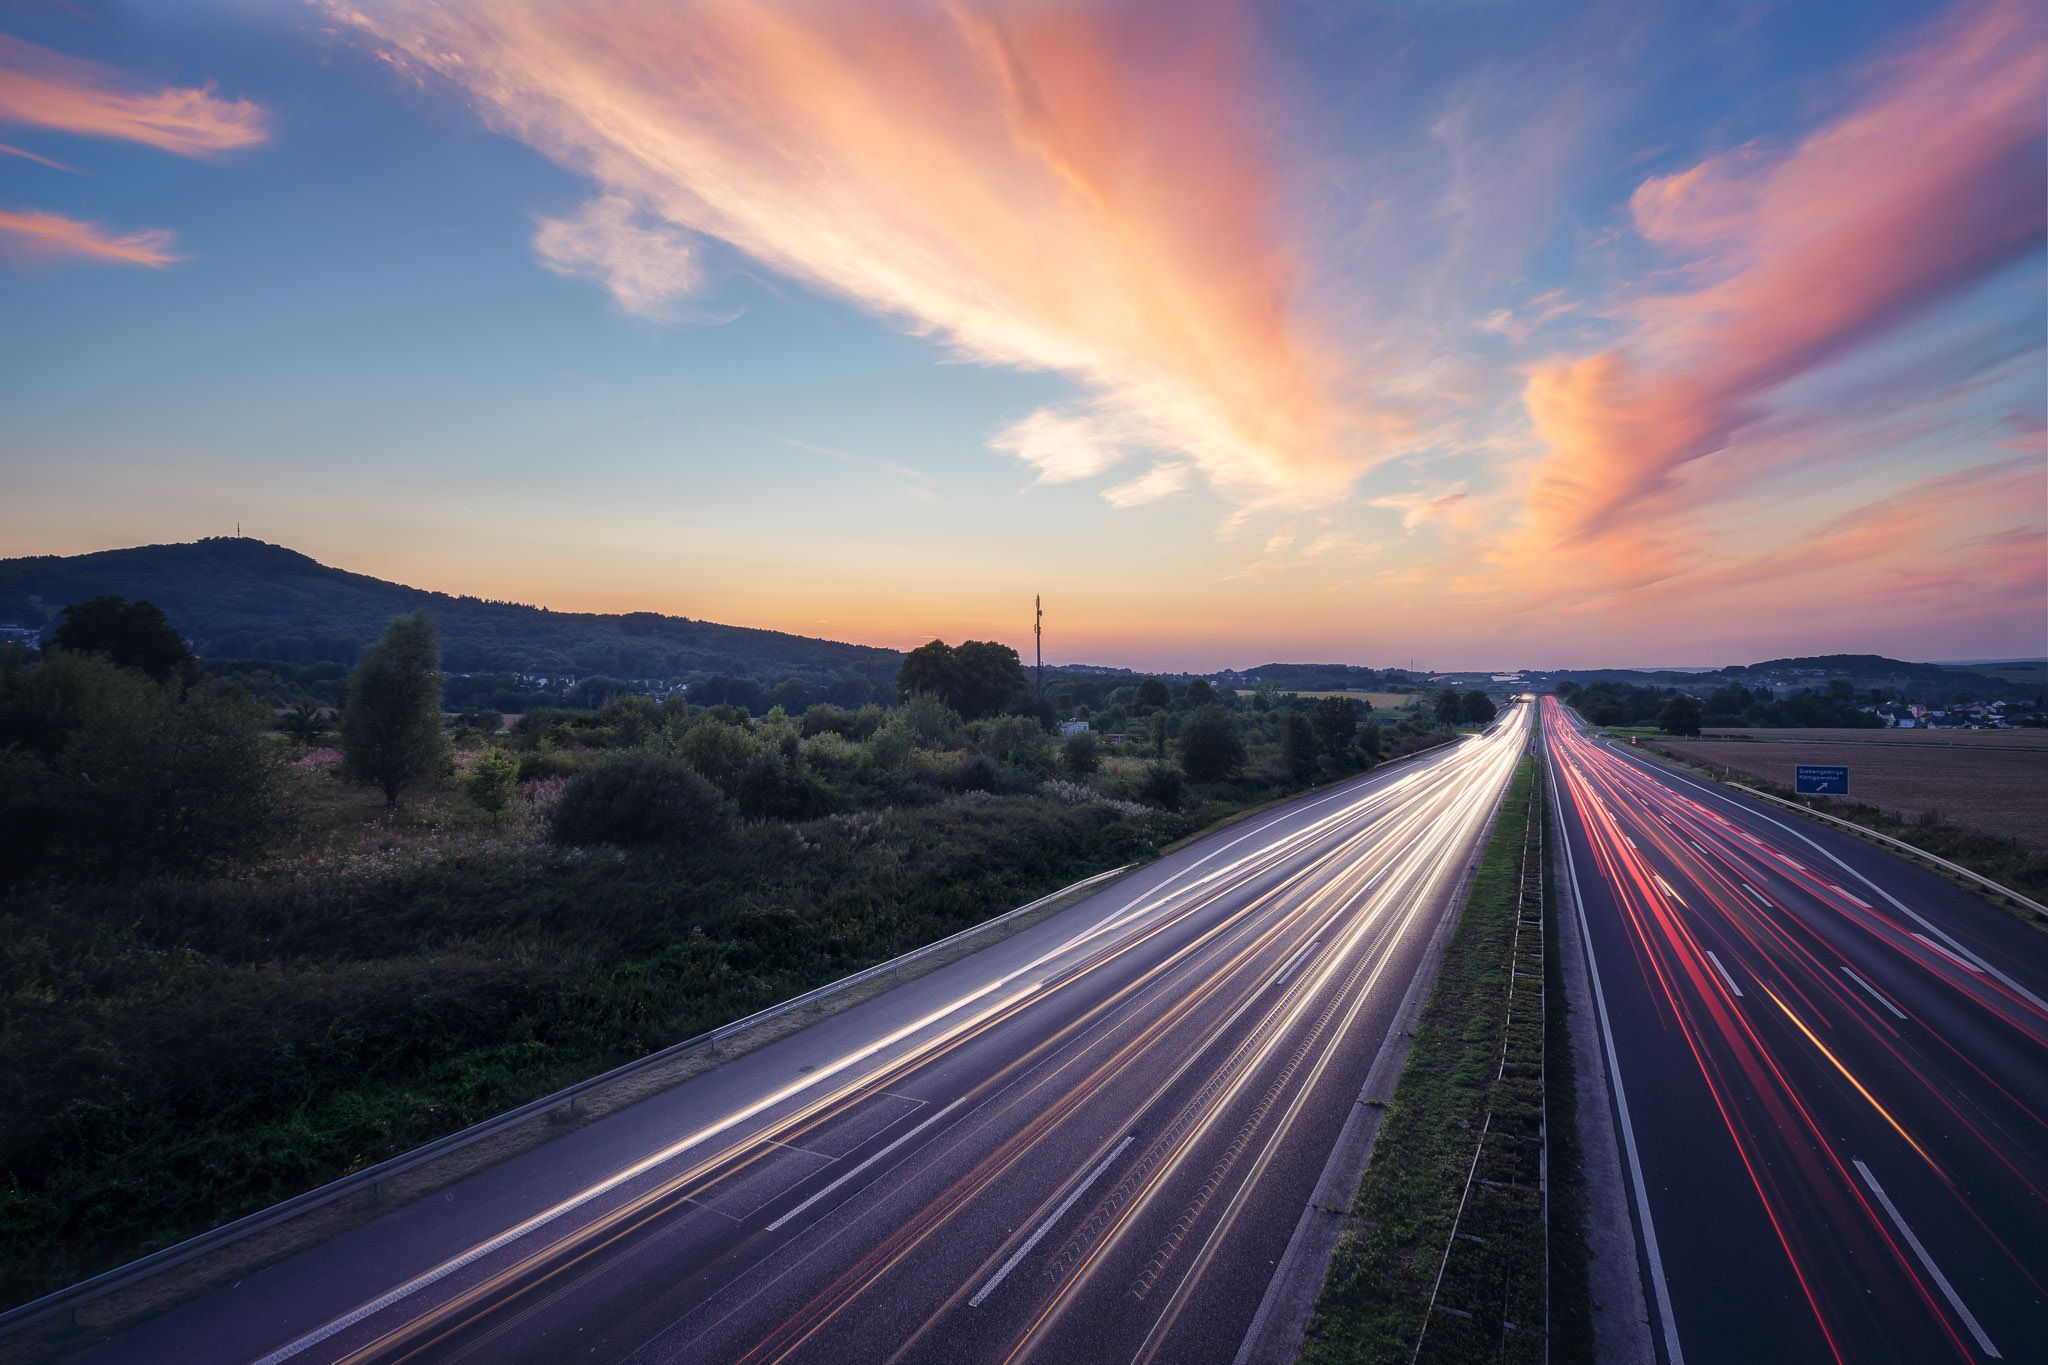
This is my final photo which I call heavens highway because the clouds have the same direction and even the same colors as the streams on the highway.
If you want more streams in your photo you might even duplicate the layers and move them, but I am pretty happy with what I got and I don’t like it when there are too many of those trails, because I still want to have a pretty natural look. The same applies to adding these effects afterward in Photoshop without the second series of photos we took. It’s easy to add car trails by just using the pen tool, but I really like the randomness you get when you capture them instead of just adding them in post-processing.
I hope you like the effect and the article and if you did so, I would really appreciate your feedback or a share of this article. Thank you very much!


Comments (9)