Photography is often not only about knowing your equipment but also about knowing the different techniques you can use to improve your images and to get the results you have in mind while shooting the scene. Fokus Stacking is something I really like, but let's start with why we even need it and why it’s such a great tool to have.
What is Focus Stacking?
Something probably every photographer knows about is the Bokeh, which occurs for example in the background when you focus the eyes of a person with your lens. The background gets blurred, depending on the focal length and the aperture you are using. This is something we definitely want to have in portrait photography, but landscape and architecture are often about having sharp photos all the way from the foreground to the background. Usually, we achieve this by using an f-stop around 8 to 11, because this is the range where anything should be sharp within our image without losing quality. Using higher values like f/22 creates lens diffraction, which results in blurry details and therefore less sharper images, something we initially intended to increase by using a smaller aperture (which is equal to high f-numbers).
So, just staying around f/8 to f/11 should be fine right? Yes and no, it depends. If you have something within your frame that is very close to you, the depth of field (the distance between the nearest and farthest objects in a scene that appears sharp) often isn’t big enough to get everything sharp. Instead of using a smaller aperture and having a less sharp photo, we can solve this problem with the Focus Stacking technique.

The initial problem: When you have objects that are very near to the camera and you focus the foreground, the flowers obviously get pretty sharp. The background is very blurry though.

The same issue occurs when you focus the background, leaving the objects very near to the camera out of focus.
The idea behind Focus Stacking is to take multiple shots of your scene with a different focus. Take one sharp photo of the background, change the focus of your lens to the middle ground, take another shot, and change the focus again to the foreground to take a third photo. Those 3 images now have different areas of sharpness, that can be combined by using Adobe Photoshop. By using the sharpest parts of every image, you will get one final image that is sharp everywhere.
When to use Focus Stacking?
Every technique has its benefits and drawbacks, so it’s quite important to know when you can use it and why. For me the main reason is to get much more depth within my photos, because you can capture everything within one shot with a wide-angle lens, beginning from something that’s very near in the foreground until something that’s far away. Especially photos taken in vertical format are predetermined for this technique.
Use it
The depth of field is too small to have everything in focus. You can check this by focusing on the most important part of your scene because that’s obviously what definitely needs to be sharp, take the shot and zoom in on your image to see if everything is sharp enough. You could also set the focus somewhere around the middle of your image, to have as much depth of field towards both sides, the fore- and the background. This is so-called "Hyperfocal Distance" which can lead to having the most important parts out of focus and everything just nearly sharp, so I can’t recommend this, because I want to have everything really sharp.
There is a second great reason to use Focus Stacking and that’s tiny movements within your scene. A tulip field is a great example because the flowers will be moved by the wind. Using this technique allows us to use a smaller f-stop, resulting in a faster shutter speed and therefore again in sharper images. Additionally increasing the ISO can also help within difficult situations.
Don’t use it
Where tiny movements are usually no problem for Focus Stacking, anything else that’s moving is obviously something that won’t work with this technique. This is especially the case when the whole scene is moving and not only a small part, that you could capture within one image. If anything is moving in the transition between 2 images that should be stacked, it’s often not possible to blend them seamlessly. This is particularly true for the transition between the fore- and the middle ground, where a lot of details are visible to the viewer of your image.
Another reason to pass on this technique is time, which is true for taking the photo and doing the post-processing. Sometimes you only have a very small time window to get your photo during sunset for example and if you are not familiar with changing your focus, you will lose valuable time to get your shot or try other compositions.

This is a good example of how movement can mess up with stacking your photos. The windmills may look pretty futuristic now, but Photoshop obviously had some issues with stacking the images. This case is easy to solve though by just masking in the image for the background manually.
How to do Focus Stacking?
I would definitely recommend you to try this technique, if you haven’t done it before, when you have enough time during the shooting itself, because getting used to it will cost you some time at the beginning. The time is well invested though in my opinion and afterward it’s pretty easy to use it.
Capturing the photos
Something you will definitely need is a sturdy tripod (read more about this topic in my article about Carbon Fiber vs Aluminium Tripod), because it’s important to have nearly the exact same image section on each of the photos. I would recommend you to start with the foreground because changing the focus will also slightly change the image section.
Get started with composing your image and changing your camera to live view, so that you can see the image on your display instead of the viewfinder. Now digitally zoom in as much as you can and manually focus on the nearest point of the scene. Using this way to focus your images is something I can definitely recommend to you anyway, because you will have much more control over the sharpness, especially during difficult lighting conditions, which is often the case during sunrise, sunset, or dark scenes in general. I am always using this way to focus my images. Most of the new cameras even have a feature called "Focus-Peaking" to outline the edges in your image, that are currently focussed. This can also help you to get the maximum sharpness where you want it to be.
After you took your first photo you should still be zoomed in on your display and move the frame position towards the background until you recognize a decrease in sharpness. That’s the next image position you will need to set your focus to and capture it. Repeat this process until you reach the farthest part of your image.
The smaller your f-stop, the smaller your depth of field and the more images you will need, so using something around f/8 to f/11 is usually a good choice. Even if f/11 is usually not the sweet spot of your lens and therefore the sharpest f-stop you can use, it may save you some effort afterward in post-processing.
Combining the photos in post-processing
Thanks to modern software like Adobe Photoshop, this part is usually pretty easy.
- Begin with retouching your photos like you would normally do. In my case, I am starting with Adobe Lightroom to do the initial improvements and color corrections to my image. Afterwards, you should just synchronize those changes to the other focus stacked images, because the more similar the images are in brightness etc., the easier it will be for the software to recognize the sharp areas.
- If you are also using Lightroom, you can select the images, right-click on them and use Edit in > Open as layers in Photoshop. If you are not using Lightroom, you can simply copy and paste each image to different layers within one PSD file.
- As I already told you, the image section will be slightly different. For this reason, we need to select all layers and use Edit > Auto-Align Layers… You could even skip this whole step 3, because Photoshop will automatically try to align the layers within the next step, but it’s usually better to have more control between those actions and check if everything worked out nicely.
- Now you can select all layers again and use Edit > Auto-Blend Layers… Set the Blend Mode to Stack Images, because that’s exactly what we want to do here. You can check Seamless Tones and Colors, but I would leave the Content Aware Fill unchecked because that’s something I would do manually afterwards if needed.

- Finally you can crop your image to the size of the foreground image, which will be the smallest one and was therefore the reason to begin the shooting with. You can also combine all layers to one final layer by using Strg-E or Cmd-E. Please check in advance, if Photoshop really stacked anything like you would expect it. Otherwise, you can still optimize the automatically generated masks with a brush.

There we go and here is your focus stacked image. You can now continue with any other post-processing stuff you would normally do.

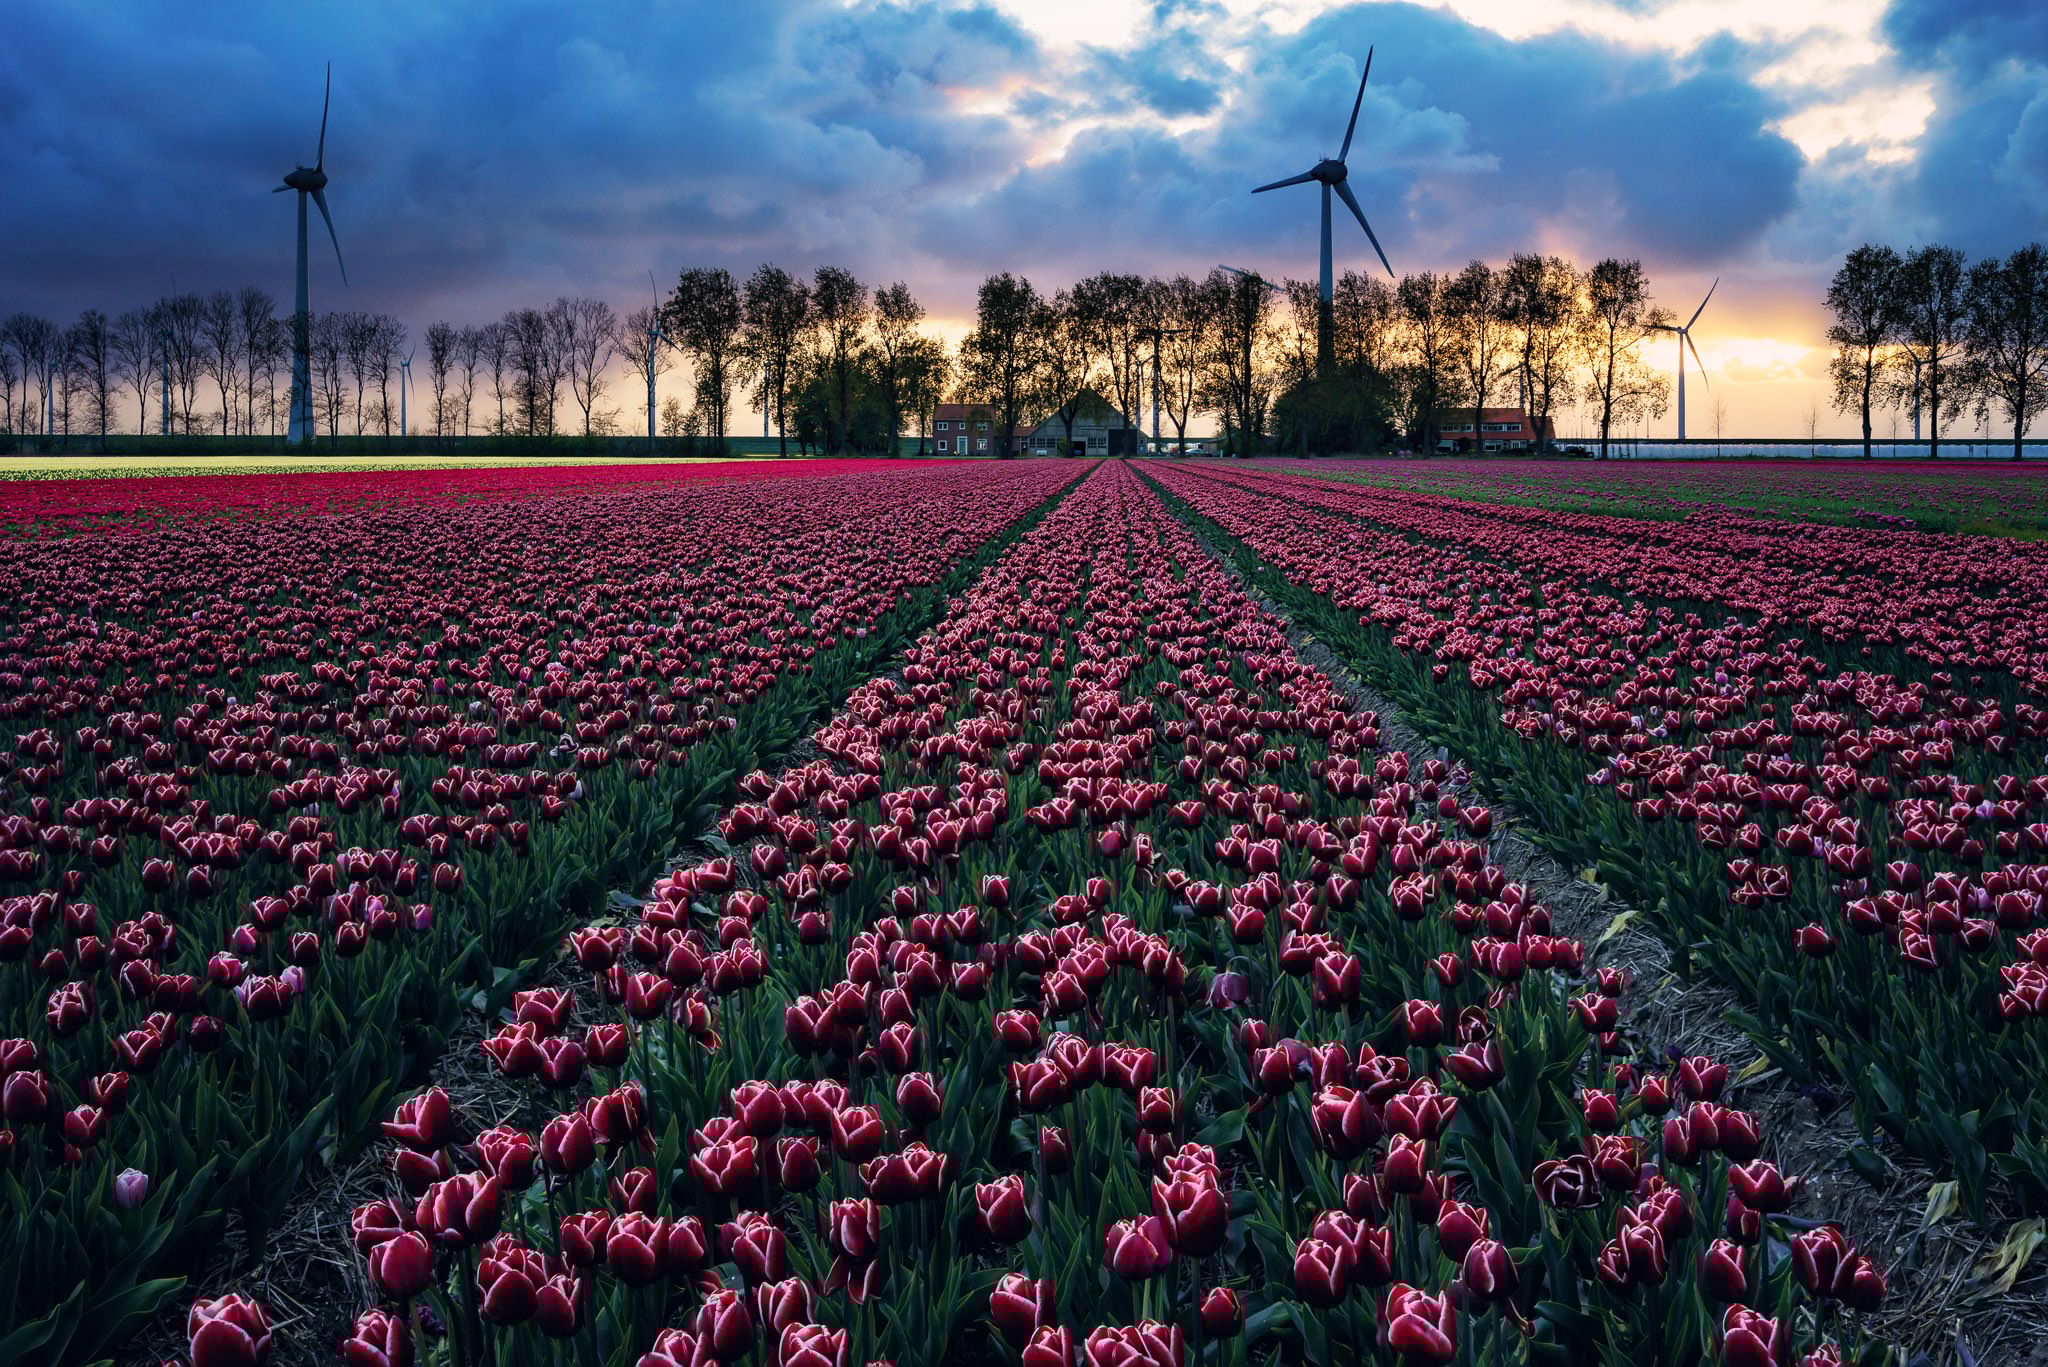
This is how the final focus stacked image of a tulip field near Espel in the Netherlands can look like. I took an additional photo just for the clouds so that they are also perfectly exposed. I finally merged them in as another layer after stacking the images.
Additional advice
If the parts within your image were moving a little bit, it’s always a good idea to duplicate your images right after step 3. The reason behind this is, that Photoshop often can’t merge all the regions of your image perfectly, which might require some manual work after auto-blending the layers.
By giving the duplicated layers a black mask you can now easily paint in areas by using a white brush onto your layer mask.

This is an example for stacking moving objects. Sometimes Photoshop merges the layers correctly in general but leaves some spots with ghosting effects (transparent flowers). In this case, we can just manually mask the layer in to get rid off this effect, especially in the foreground where mistakes like this would be visible to the viewer.

This is how your layers could look like when you've duplicated them before stacking. I added the black masks manually to the copied image layers and I am now able to paint in the layer that I need without changing the masks, that were automatically generated by Photoshop.
Do you have any questions about this technique or are you already using Focus Stacking? I would love to hear from you in the comments below!


Comments (30)