
USA Olomana Trail - Third Peak (Ahiki)
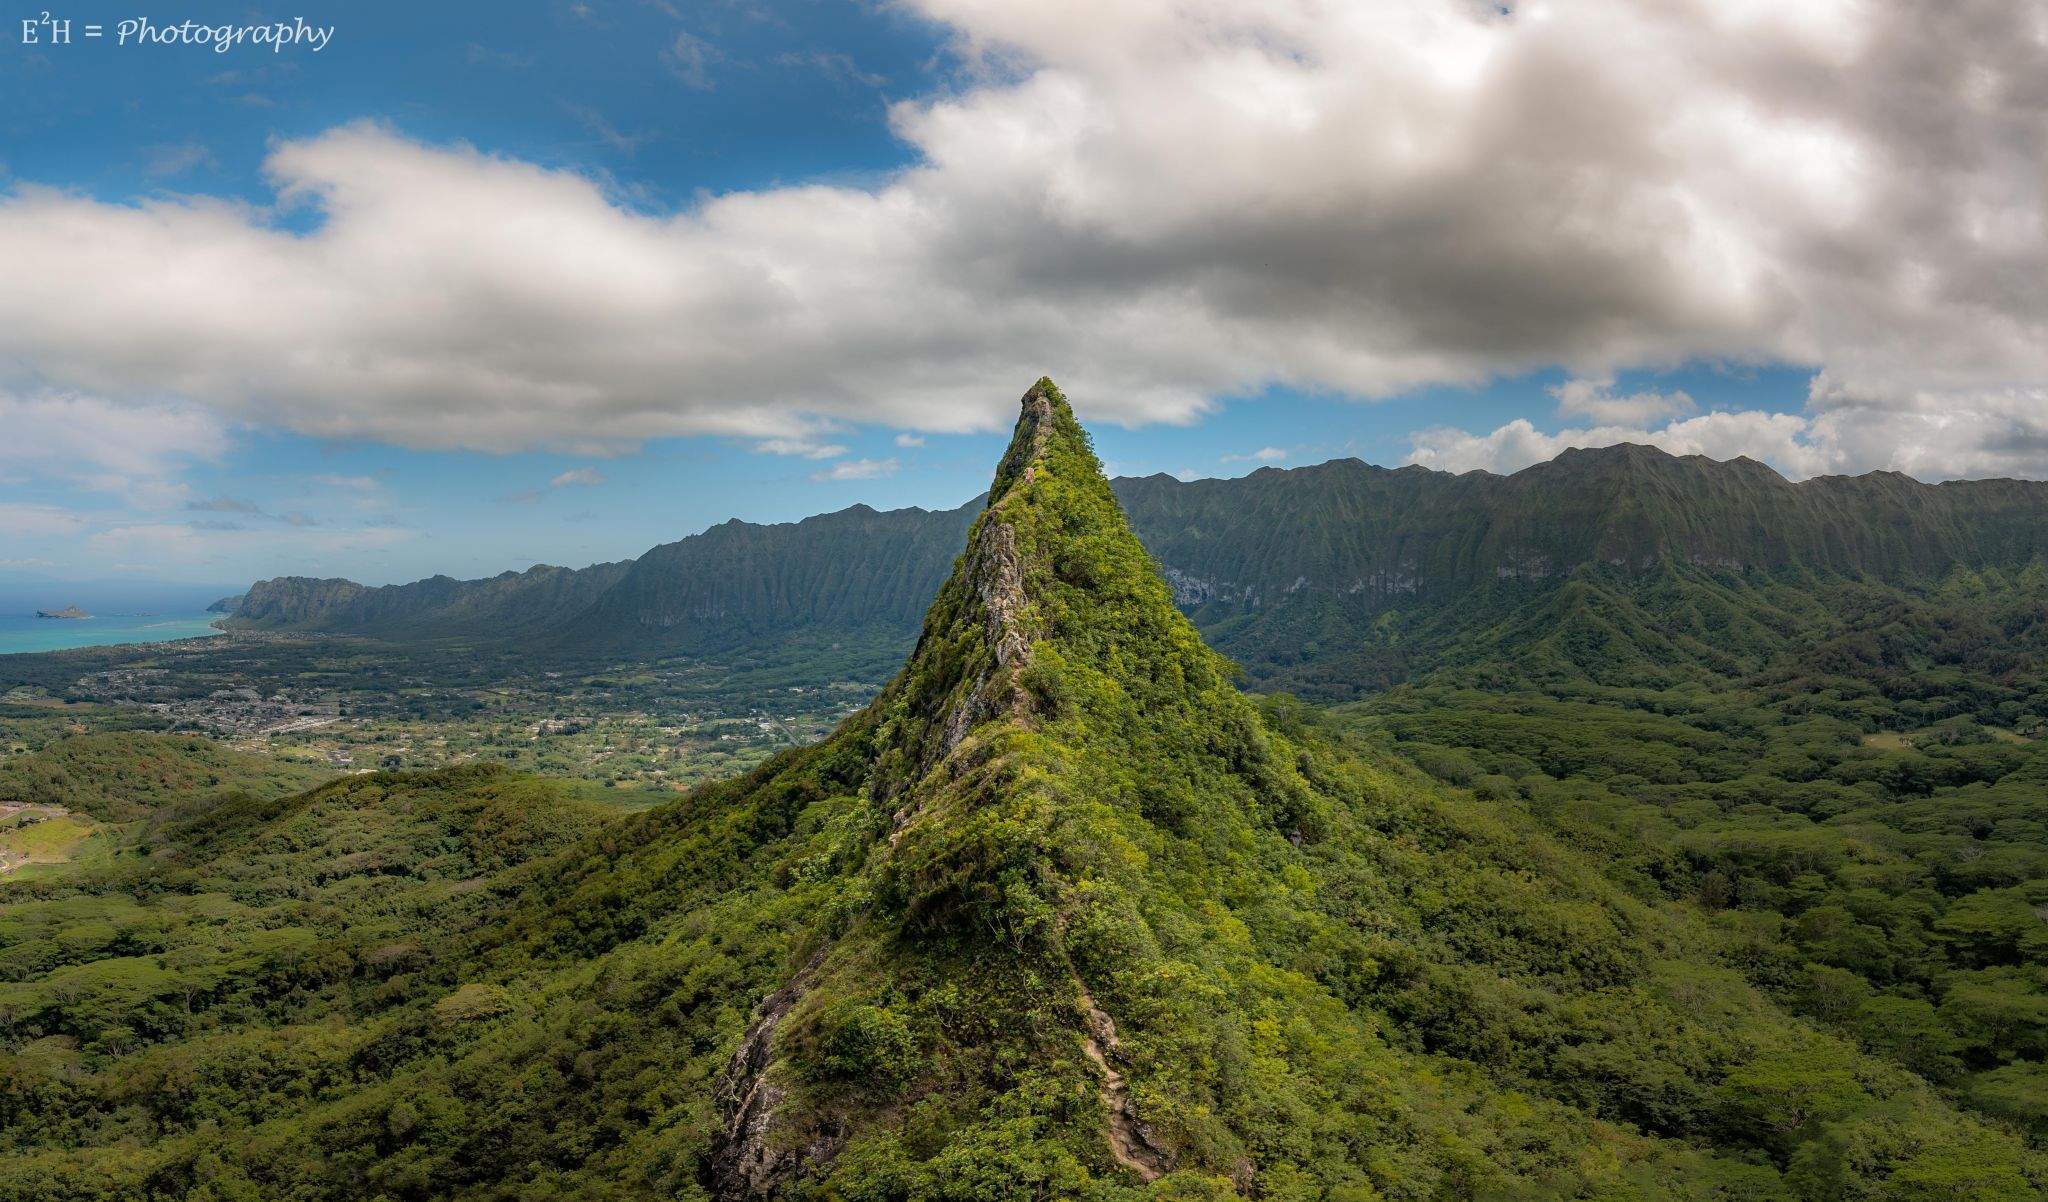
This is a photo of Olomana's 3rd peak Ahiki. The photo was taken on the Olomana trail approximately halfway down the second peak (Paku'i).
The Olomana Trail (aka Three Peaks) is a path which leads up a spectacular three-peaked mountain. Technically, Olomana is the name of the first peak. The second peak along the trail is Paku'i, and the third peak is Ahiki. This mountain is located between Kailua and the southern Ko'olau Ridge.
The Olomana Trail (aka Three Peaks) is a path which leads up a spectacular three-peaked mountain. Technically, Olomana is the name of the first peak. The second peak along the trail is Paku'i, and the third peak is Ahiki. This mountain is located between Kailua and the southern Ko'olau Ridge.
Photography Tips
This trail provides great views of eastern Oahu (Kailua and Lanikai) and also of the southern Ko'olau Range. Due to the difficulty reaching this area, most photographs will be taken in the late morning, afternoon, and very early evening. It's virtually impossible (and suicidal) to reach this spot in the dark.
A polarizing filter was used and is recommended. If conditions are windy, you may want to consider increasing the ISO to reduce the shutter speed.
- I would NOT recommend to bring a tripod due to the weight / bulkiness of such an item.
- The landscape is huge. Bring a wide angle lens if using a camera.
- Pack extremely light and do not bring any unnecessary items. See travel information for more details.
This is a 3 photo panorama. The specs of the center photo are shown below:
Camera: Sony Alpha A7 III
Lens: Sony 16-35 f/2.8 G-Master
Shutter Speed: 1/125 sec
Aperture: f/8
ISO: 100
Focal Length: 17mm full frame (approx. 11mm on an APS-C sensor)
The 3 photos were merged in Lightroom using the Panorama Merge function.
Travel Information
(Sorry, this is going to be long)
FIRST SECTION - Getting to the trailhead...
Olomana is located on the eastern (windward) side of Oahu south of Kailua. The trailhead sits in the driveway / access road to the Royal Hawaiian Golf Club.
Make your way to the Pali Highway (61). Turn on Auloa Road.
(**If coming from Honolulu, Auloa Road connects in two places. Turn right at the 3rd traffic light after exiting the tunnel... The first light will take longer to arrive.)
Once on Auloa turn immediately left onto Loop Road. You will eventually see a guardhouse on the left. That's where I was dropped off. If a guard is present, let them know you're there to hike Olomana. They should let you pass. Sometimes they will request ID.
I was dropped off at the guard house and, at the time, nobody was present. So I was able to walk approx. 0.25 mile to the trailhead. It is clearly marked on the left with a sign.
If you're driving (i.e. not being dropped off)... I've read that hikers routinely park along Auloa Road near the intersection with the Pali Highway. Be careful though, as you may be ticketed for parking on an unimproved sidewalk. Because I don't have experience, please research parking yourself.
SECOND SECTION - Getting to the spot...
Watch YouTube and read various blog posts about Olomana.
In a nutshell, absolutely do not attempt during or shortly after rain. Also avoid when winds are high.
You'll need to be comfortable climbing rocks / landscrape structures, and walking over exposed ridges. Some ropes exists but they are not officially maintained and the condition cannot be guaranteed.
Wear hiking shoes, go slow, take your time, be deliberate and safe. If you're athletic, sure-footed, and confident climbing you'll likely be fine. NONETHELESS, THERE IS NO MARGIN FOR ERROR. IF YOU SLIP ON A RIDGE OR AN EXPOSED WALL YOU ABSOLUTELY WILL FALL TO YOUR DEATH. Keep that in mind.
Pack light - you don't want a bunch of gear weighing you down and creating issues climbing. I simply packed: Camera + lens + polarizing Filter, sandwich, driver's license, credit card, ~3L of water, and a small lucky charm.
In my opinion:
The final climb to the first peak was a bit difficult due to lack of hand / foot holds. Rope was helpful. Area around the first peak is sheer. Be careful.
Going from peak 1 -> peak 2 was relatively easy. Rope section to reach peak 2 wasn't hard at all. Still need to be careful - the ridge is completely exposed and sheer.
I scaled down the 2nd peak and took a lot of photos. There are two "good" / "stable" areas to take photos approx. 50% and 70% down. After reviewing, I think the upper area produced a slightly better view.
I continued down the 2nd peak to its base, and then went about 25-30% up the 3rd peak. There exist some extremely dangerous areas once you are ~60% up the 3rd peak.
A couple handfuls of young men (and a few young women) went up to the third peak. As of this posting I'm 35yo and still a fairly athletic / fit guy. But nonetheless I captured the photo I came for and didn't want to attempt climbing an extremely dangerous area without a harness. As I mentioned above, any small mistake is deadly.


Spot comments (0)