It’s already great to see which photo you could take and at which spot you would have to stand, to get the same view, but planning your trip would be even better, if you could see how the spot itself looks like. This is where our new „Behind the Scenes“-feature comes in.
Based on your feedback, we worked hard to improve the platform even more and implement this enhancement, which is available for everyone since today. We hope, that this will improve planning your photo trips in the future even more, because being able to see the spot itself will help you to…
- find the exact place
- get a better feeling for the space you have and how many photographers can stand there simultaneously
- decide for the right equipment and clothing, to get the best possible shot
- estimate how safe the area might be

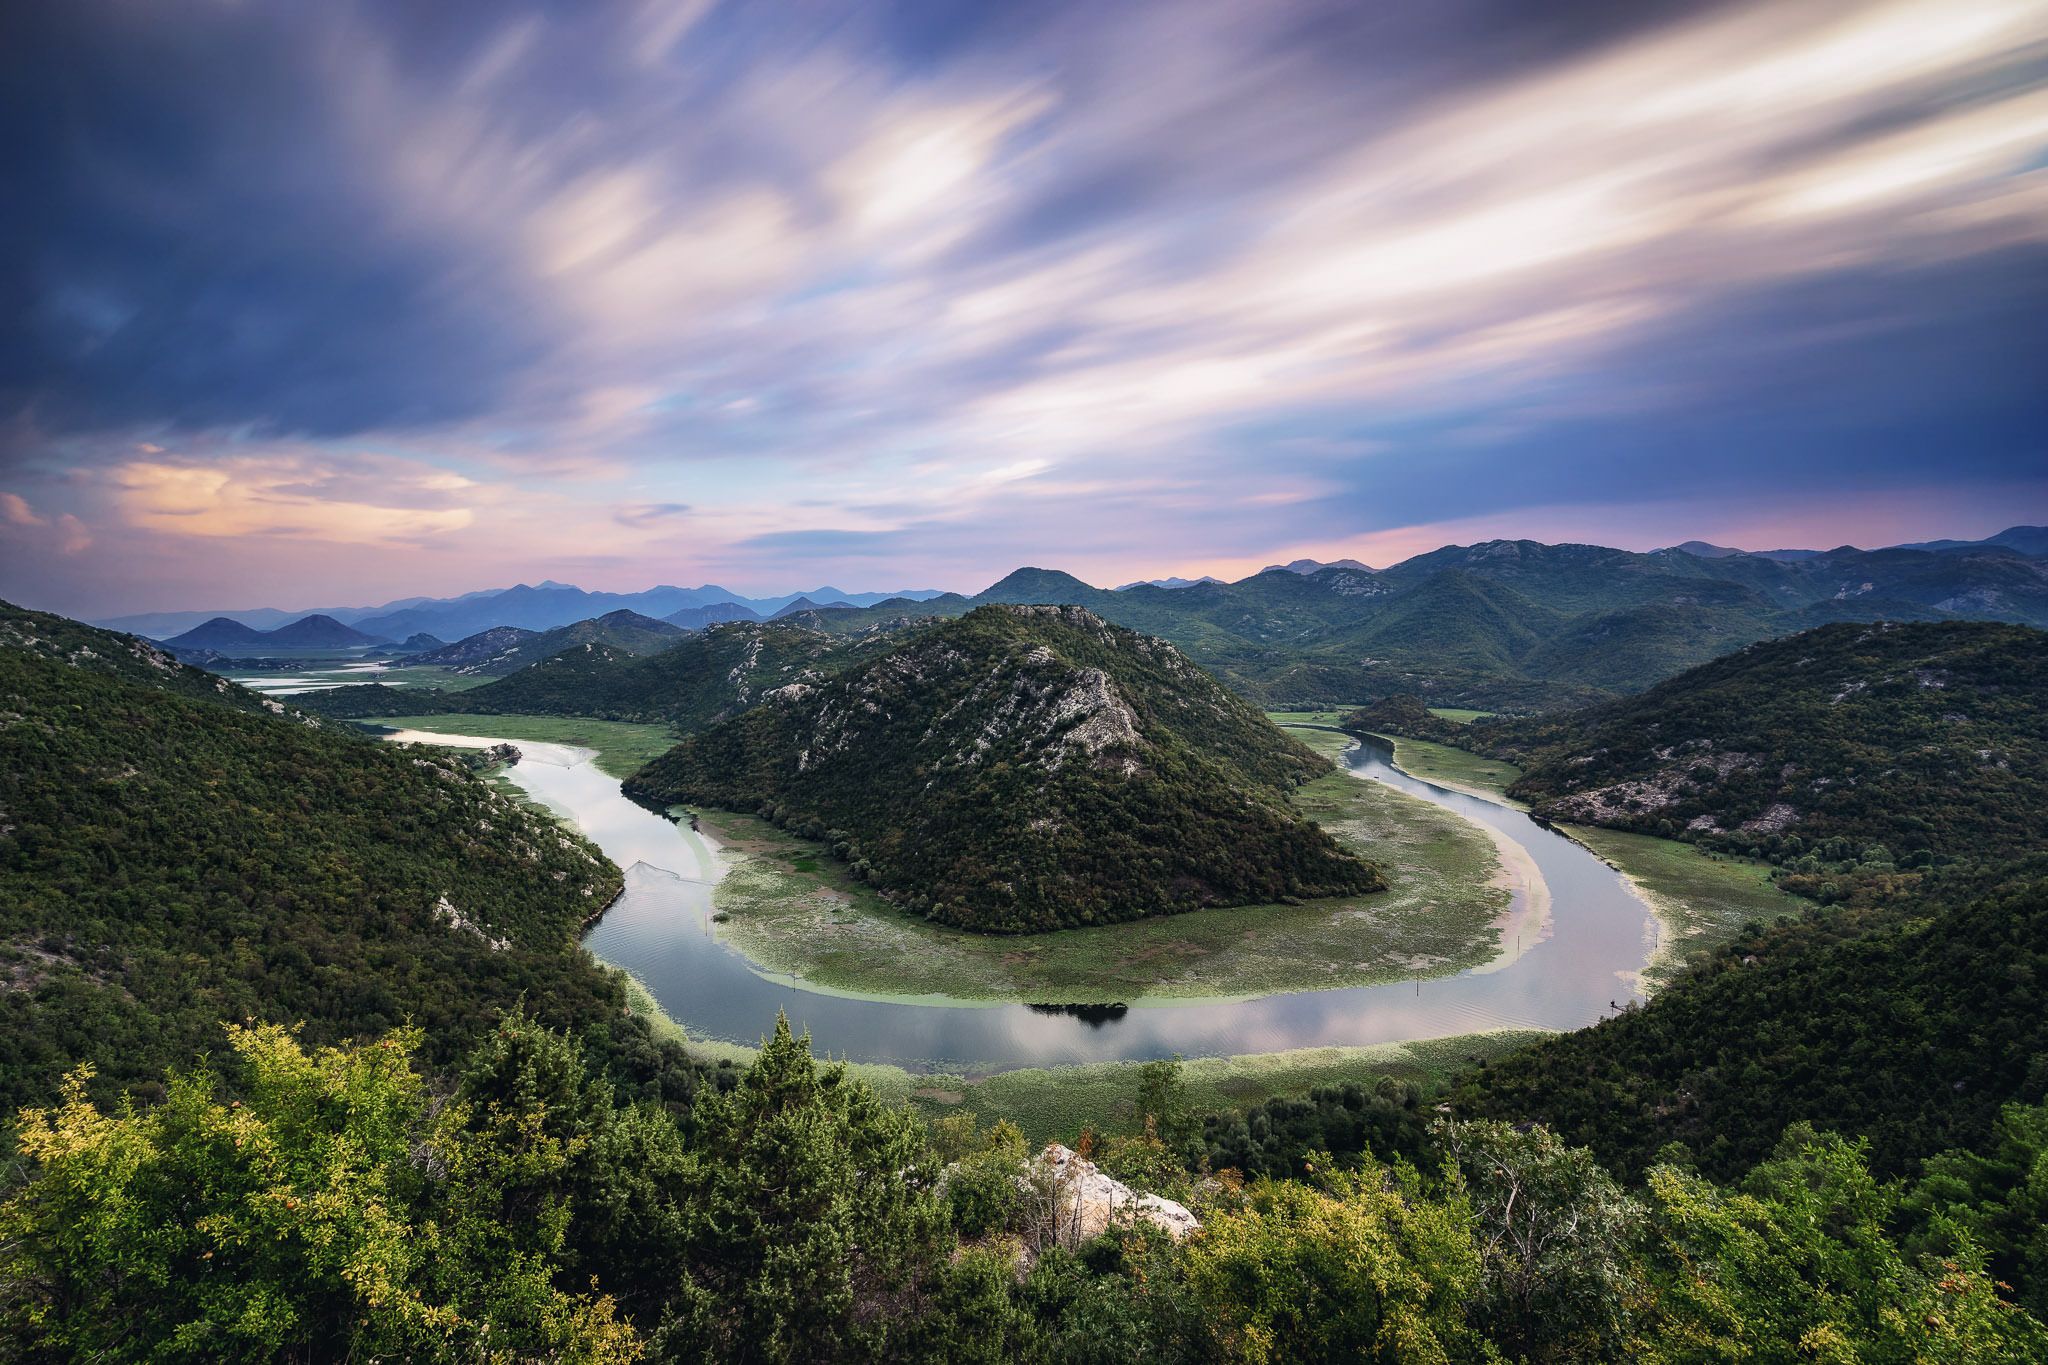
This is how the spot itself in Montenegro from the title photo looks like. There is only space for a max of 2 tripods and you are standing near the edge.
As always, this feature will only be helpful if as much people as possible will participate and add their photo from behind the scenes, making it easier for everyone else in the future to visit various places. Thank you very much in advance!

There is only space for max. 2 cars. You can't park on the street itself, because the narrow curves are the only places where you could pass other cars.

If somebody comes from the front, you will have to drive backwards to curves like this.
There is one more thing
I always wanted to say this famous sentence of Steve Jobs, because I love when something new even gets better by an additional surprise. Adding photos of the spot are definitely a really nice improvement, but wouldn’t it be better if you could not only see the tripod standing at a spot, but viewing the whole scene from this perspective?
Well, that’s why we teamed up with Ricoh and used their Theta S camera to integrate 360 degree photos into our new feature, making it possible to see the whole area, instead of just a tiny frame. We hope, that you are as excited as we are, because this will make planing your next photo tours around the world even easier.
You can already try the 360 degree view at this spot on the "Oelberg" in the beautiful "Siebengebirge".

The Theta S by Ricoh gives us the ability to capture the whole scene around us with only one shot, which will be stitched automatically to a full "equirectangular" image.
How you can add photos
If you click on the „Add photo“-button just beside the „Bookmark“-button in every spot, there are two options now to add a photo:
-
Final photo
This option is equal to the old „Add photo“-button, making it possible to upload your final shot and add it to the existing spot -
From „Behind the Scenes“
This is the new feature, where you can upload photos taken with your smartphone or even 360 degree photos, as long as they will provide some value about the spot itself to future visitors. If you upload your 360 degree image from a spot as a „Behind the Scenes“-image, the platform will automatically recognize the format and display it accordingly.
Do you like the new „Behind the Scenes“-feature or is there anything we could improve? I would love to hear from you in the comments below!


Comments (8)